Day 17: The Wishlist App
For today's article, I really wanted to demonstrate concepts using a practical example application. It is possible I let the example get away from me!
In today's article I intend to show how to use template composition techniques to produce a wishlist app. We will cover layouts, partial templates, content blocks.
The data model is admittedly rough, however I think my plan will be to make that a feature and not a bug. Today we will example concepts mostly relating to the templates, then in tomorrows post I will migrate the model from using the simplistic persistence of DBM::Deep that it uses now to Mojo::SQLite.
At that point I hope to put the application into a repository of its own. In the meantime however, you can see the application in the source for this article. To run it, you will need to install two additional modules, DBM::Deep and LinkEmbedder.
$ cpanm Mojolicious DBM::Deep LinkEmbedder
Layouts
Most web sites have a defined style and layout between pages. A header bar, a sidebar for navigation, a footer. The content of each might change slightly between pages but the similarity is remarkable.
Do the developers copy and paste this logic between pages? Certainly not!
The first tool of the trade is a layout template.
This is a template that will contain the results of rendering some inner template.
This will usually contain the outermost tags, like <html>, <head>, and <body>.
They will likely also establish any structure that exists on all of the pages, like navigation and sidebar sections.
Let's look at the layout that our wishlist application
<!DOCTYPE html>
<html>
  <head>
    <meta charset="utf-8">
    <meta http-equiv="X-UA-Compatible" content="IE=edge">
    <meta name="viewport" content="width=device-width, initial-scale=1">

    <title><%= title %></title>
    <link rel="stylesheet" type="text/css" href="//maxcdn.bootstrapcdn.com/bootstrap/3.3.7/css/bootstrap.min.css">
    %= content 'head'
  </head>
  <body>
    <nav class="navbar navbar-default">
      <div class="container">
        <div class="navbar-header">
          <a class="navbar-brand" href="/">
            Mojo Wishlist
          </a>
        </div>
      </div>
    </nav>
    <div class="container">
      <div id="sidebar" class="col-md-3">
        %= content 'sidebar'
      </div>
      <div id="main" class="col-md-9">
        %= content
      </div>
    </div>

    %= content 'footer'
    %= content 'end'
  </body>
</html>
templates/layouts/default.html.ep
Here you can see that I include the Boostrap.
You can also see a few bits of templating.
The first is that I use a <title> tag with the content <%= title %>.
This is a shortcut helper to get the value of the title key of the stash.
Well shall see in a moment how this value gets set.
The remaining template portions are each getting the contents of named content buffers.
While I establish five such inclusions, I will only actually use three: head, sidebar and the default unnamed buffer.
With the possible exception of sidebar, buffers like these are useful in almost all application layouts.
The head and end buffers let you add contents to those locations, especially useful to include extra stylesheets and javascript respectively.
The footer buffer would allow additions to be placed at the end of the body but before any javascript inclusions.
It is interesting to note that if we rendered this template directly, those buffers would all be empty. Therefore the content put into them must come from someplace else.
A Primary Template
I mentioned before the layout was like a container that would hold some inner content. Let's consider the simplest such case.
When a user first accesses the site, the will be greeted with a login page.
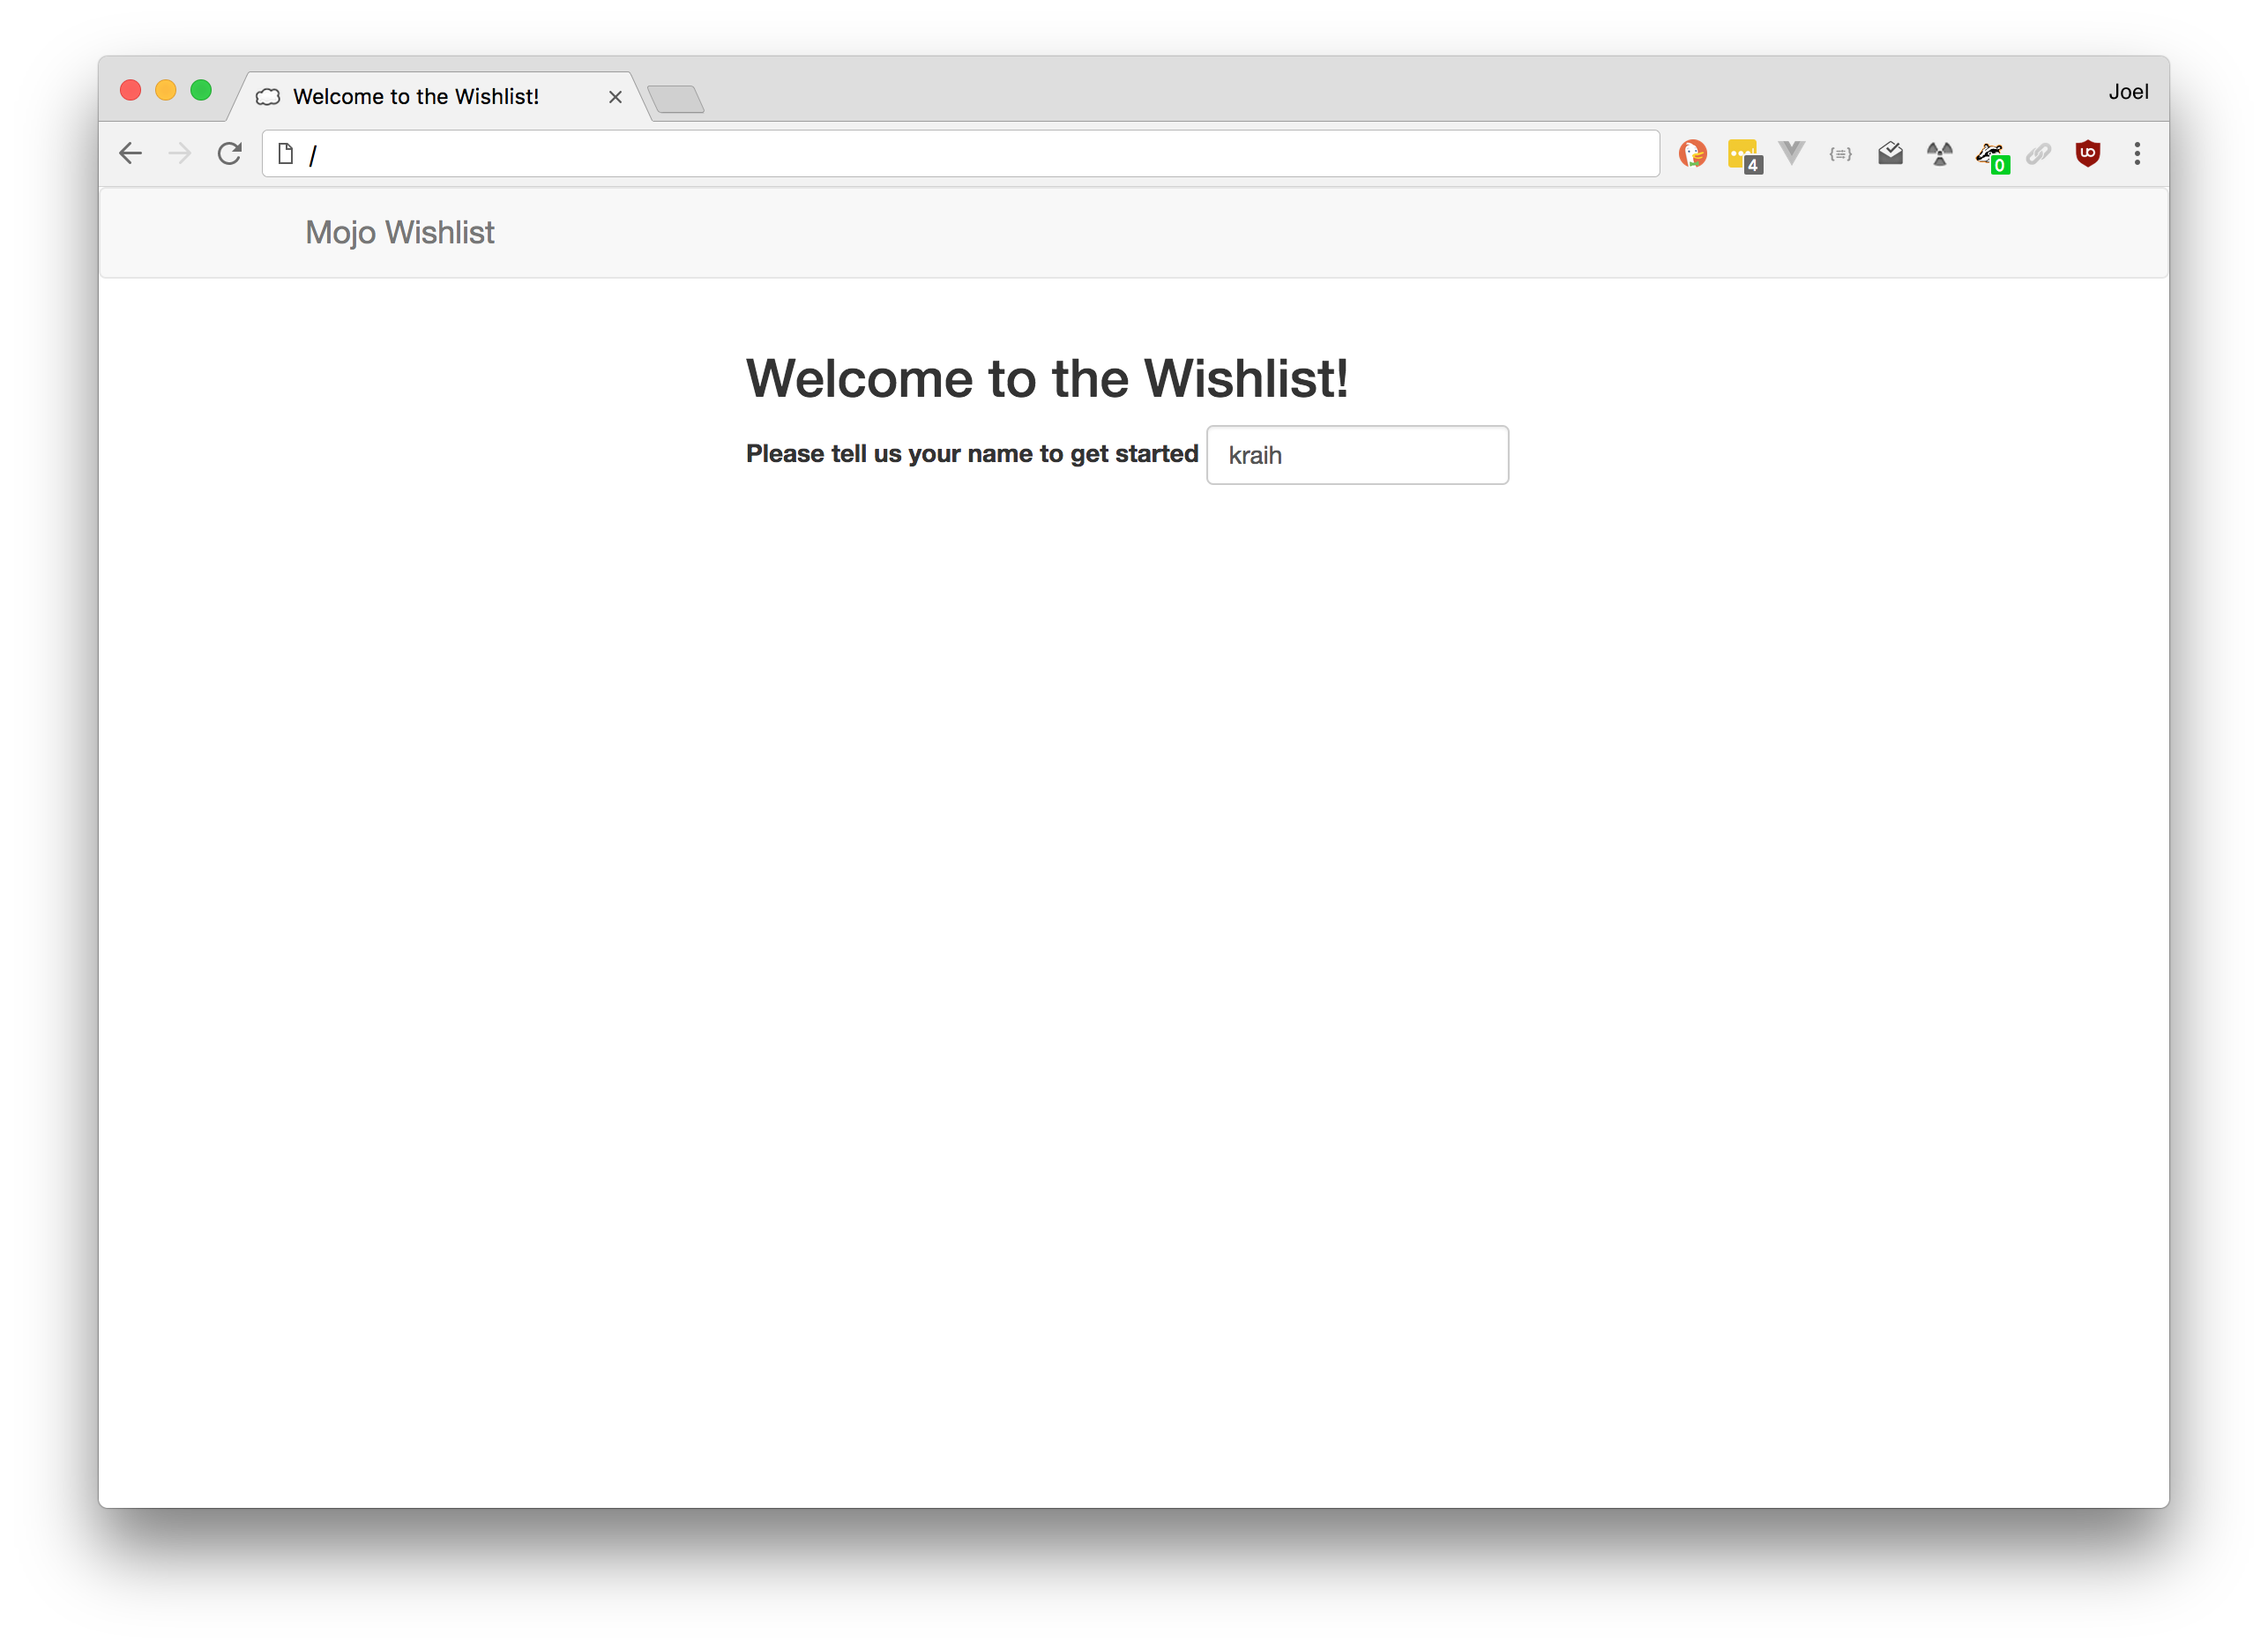
% title 'Welcome to the Wishlist!';
% layout 'default';

<h2><%= title %></h2>

%= form_for 'login' => (method => 'POST', class => 'form-inline') => begin
  <div class="form-group">
    <label>Please tell us your name to get started</label>
    <input name="name" class="form-control">
  </div>
% end
templates/login.html.ep
Immediately you can see that there are a few statements at the top. These set the layout to our default one above and set the title key for the page. It is important to realize that this page is rendered first before any layout is rendered.
After the template renders, Mojolicious will notice that a layout key was set and as a result it will render the layout with the result of the primary template rendering available as the default content buffer.
As we saw before, that content will be placed inside the #main section of the page.
However, in the process of rendering the primary template, the title was also set.
Since the layout is rendered afterwards, this value is now available to set the <title> tag at the top of the page.
While this may seem obvious, it is actually quite remarkable. If the page had been rendered all in order, the value would not have been set in time to be used there at the top of the page. Knowing the rendering order is therefore very important to understanding the rendering process.
The Application
I've gone about as far as is practical without showing you, dear reader, what the actual application script looks like.
use Mojolicious::Lite;

use DBM::Deep;
use LinkEmbedder;

helper link => sub {
  my $c = shift;
  state $le = LinkEmbedder->new;
  return $le->get(@_);
};

helper users => sub {
  state $db = DBM::Deep->new('wishlist.db');
};

helper user => sub {
  my ($c, $name) = @_;
  $name ||= $c->stash->{name} || $c->session->{name};
  return {} unless $name;
  return $c->users->{$name} ||= {
    name => $name,
    items => {},
  };
};

get '/' => sub {
  my $c = shift;
  my $template = $c->session->{name} ? 'list' : 'login';
  $c->render($template);
};

get '/list/:name' => 'list';

get '/add' => sub {
  my $c = shift;
  my $link = $c->link($c->param('url'));
  $c->render('add', link => $link);
};

post '/add' => sub {
  my $c = shift;
  my $title = $c->param('title');
  $c->user->{items}{$title} = {
    title => $title,
    url => $c->param('url'),
    purchased => 0,
  };
  $c->redirect_to('/');
};

post '/update' => sub {
  my $c = shift;
  my $user = $c->user($c->param('user'));
  my $item = $user->{items}{$c->param('title')};
  $item->{purchased} = $c->param('purchased');
  $c->redirect_to('list', name => $user->{name});
};

post '/remove' => sub {
  my $c = shift;
  delete $c->user->{items}{$c->param('title')};
  $c->redirect_to('/');
};

post '/login' => sub {
  my $c = shift;
  if (my $name = $c->param('name')) {
    $c->session->{name} = $name;
  }
  $c->redirect_to('/');
};

any '/logout' => sub {
  my $c = shift;
  $c->session(expires => 1);
  $c->redirect_to('/');
};

app->start;
wishlist.pl
Helpers
I won't go into great detail today as much of the model logic will be replaced in tomorrow's article. Still, in broad strokes, we define a persistent hash structure, the keys of which are users and the values are hashes of information.
Once you login, your name is stored in the session and in this hash.
While I haven't followed the best practices for sessions from yesterday, you certainly could and should if this data mattered to you.
But also, no authentication is attempted, this is a personal wishlist app, hopefully none of your friends are going to play the Grinch on you!
The user helper is especially clever.
You can pass it a name for lookup, if that isn't provided then a name is looked for in the stash and the session in turn.
In this way you are looking up a specific user, the user being referenced by the page, or the logged in user.
There is also a helper that uses LinkEmbedder to look up information about a link and return it. That is used when a user pastes a url that they want to add to their list. LinkEmbedder will fetch that page and scrape it for metadata using several open protocols and falling back onto heuristics if possible. It will then return the information and an short HTML representation of that resource.
Routes
The routes are mostly self explanatory, even if their code is not.
The /login and /logout handlers, for example.
There are two routes for /add a GET and a POST.
GET requests are safe and will not change data, in this case the request triggers LinkEmbedder to fetch the information which is then displayed.
Adding Items
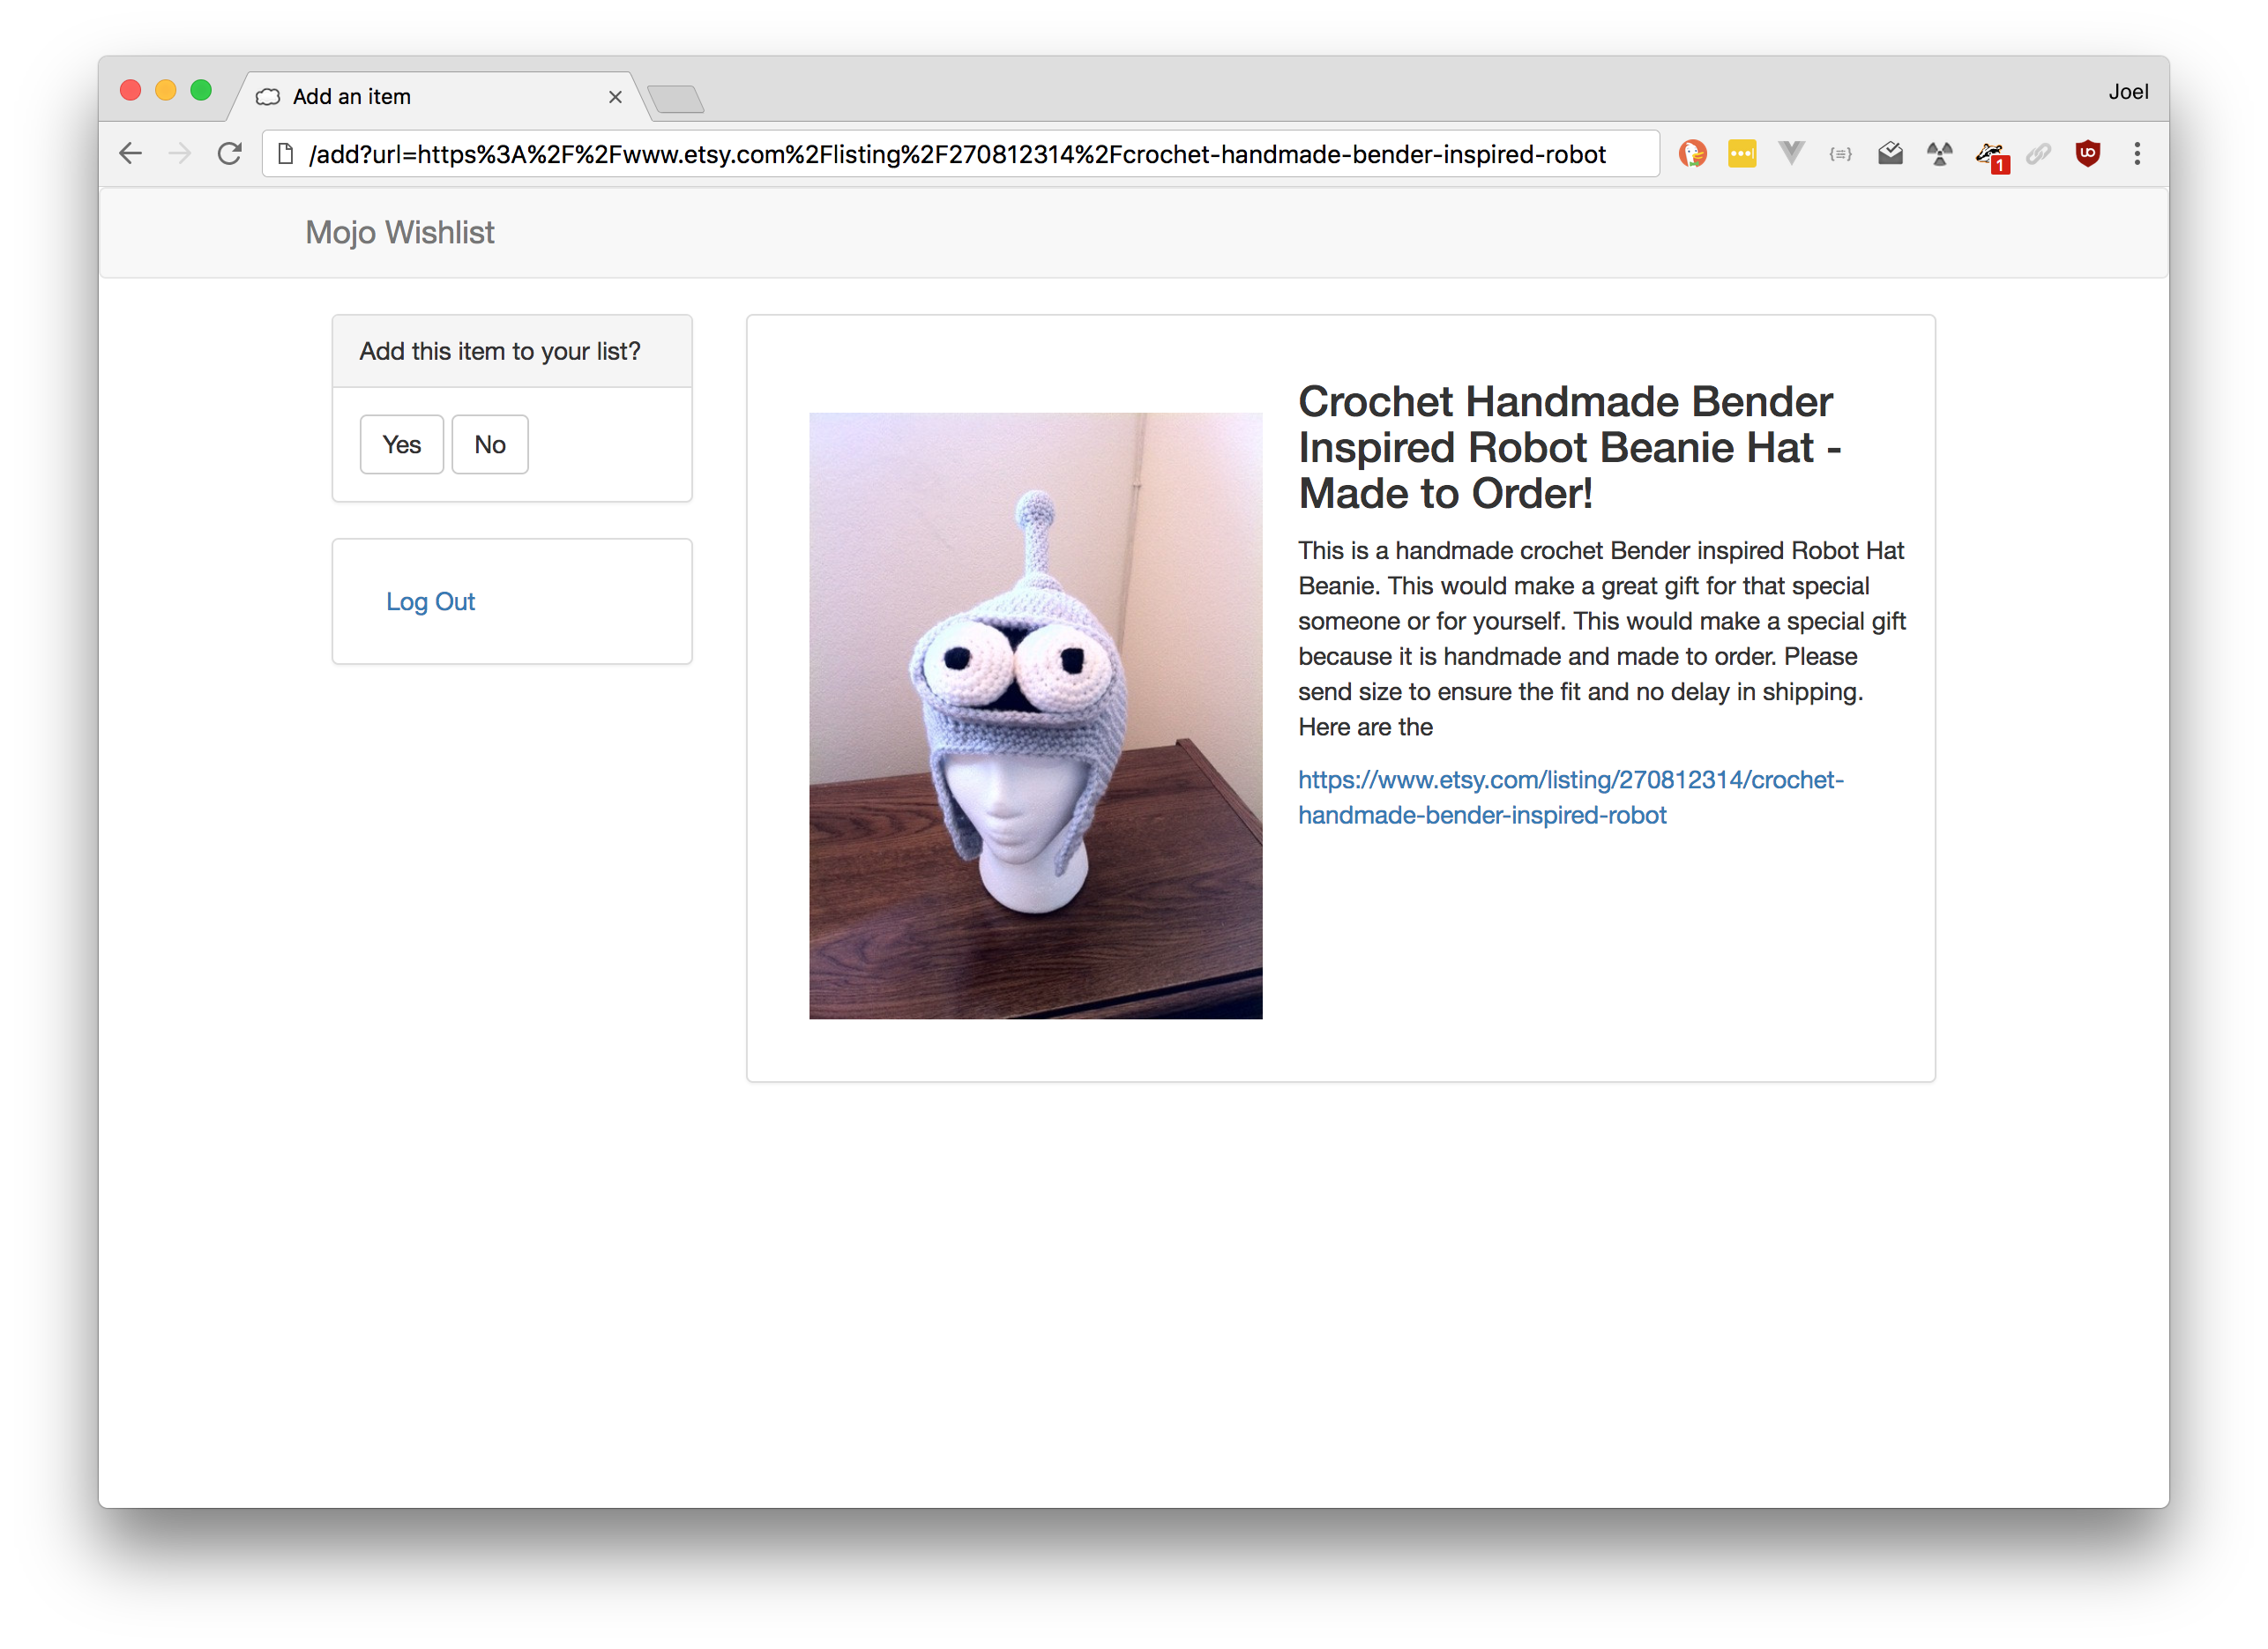
% title 'Add an item';
% layout 'default';

% content_for 'head' => begin
  <style>
    #item-detail img {
      max-width: 40%;
      float: left;
      margin: 20px;
    }
  </style>
% end

% content_for 'sidebar' => begin
  <div class="panel panel-default">
    <div class="panel-heading">
      Add this item to your list?
    </div>
    <div class="panel-body">
      %= form_for 'add' => (method => 'POST') => begin
        %= hidden_field title => $link->title
        %= hidden_field url => $link->url
        <input type="submit" value="Yes" class="btn btn-default">
        %= link_to 'No' => '/', (class => 'btn btn-default')
      % end
    </div>
  </div>
  %= include 'partial/log_out'
% end

<div class="panel panel-default">
  <div id="item-detail" class="panel-body">
    <%== $link->html %>
  </div>
</div>
templates/add.html.ep
Beyond being interesting to see how the link is used to embed HTML into the page, we also see our first uses of named content buffers via content_for.
These add styling that is specific to the page into the <head> tag and inject a panel into the sidebar.
Once this page renders, again before the layout is rendered, the content of that section is available in the sidebar buffer.
The result is a tiny form that contains the data to be stored if the user wants to add it to their wishlist. Because the resulting main page might be quite large, and I want the user to have easy access to decide if they want to add the item, I've placed it in the left hand column. Perhaps this is bad UX, but for educational purposes, it shows how these buffers can be used.
We also see our first example of include.
When called, the renderer immediately renders the template specified and returns the result.
<div class="panel panel-default">
  <div class="panel-body">
    <ul class="nav nav-pills nav-stacked">
      %= t li => link_to 'Log Out' => 'logout'
    </ul>
  </div>
</div>
templates/partial/log_out.html.ep
While our application doesn't do so, calls to include can take arguments that they see in the stash.
They can also add content to named content buffers, just like the primary template can.
All our logout "partial" template does is generate a nicely formatted link to the log out route.
The name partial indicates that, like layout, this template is not intended to be rendered on its own.
The utility of making this its own template is that many pages can use that same partial to render that same log out link.
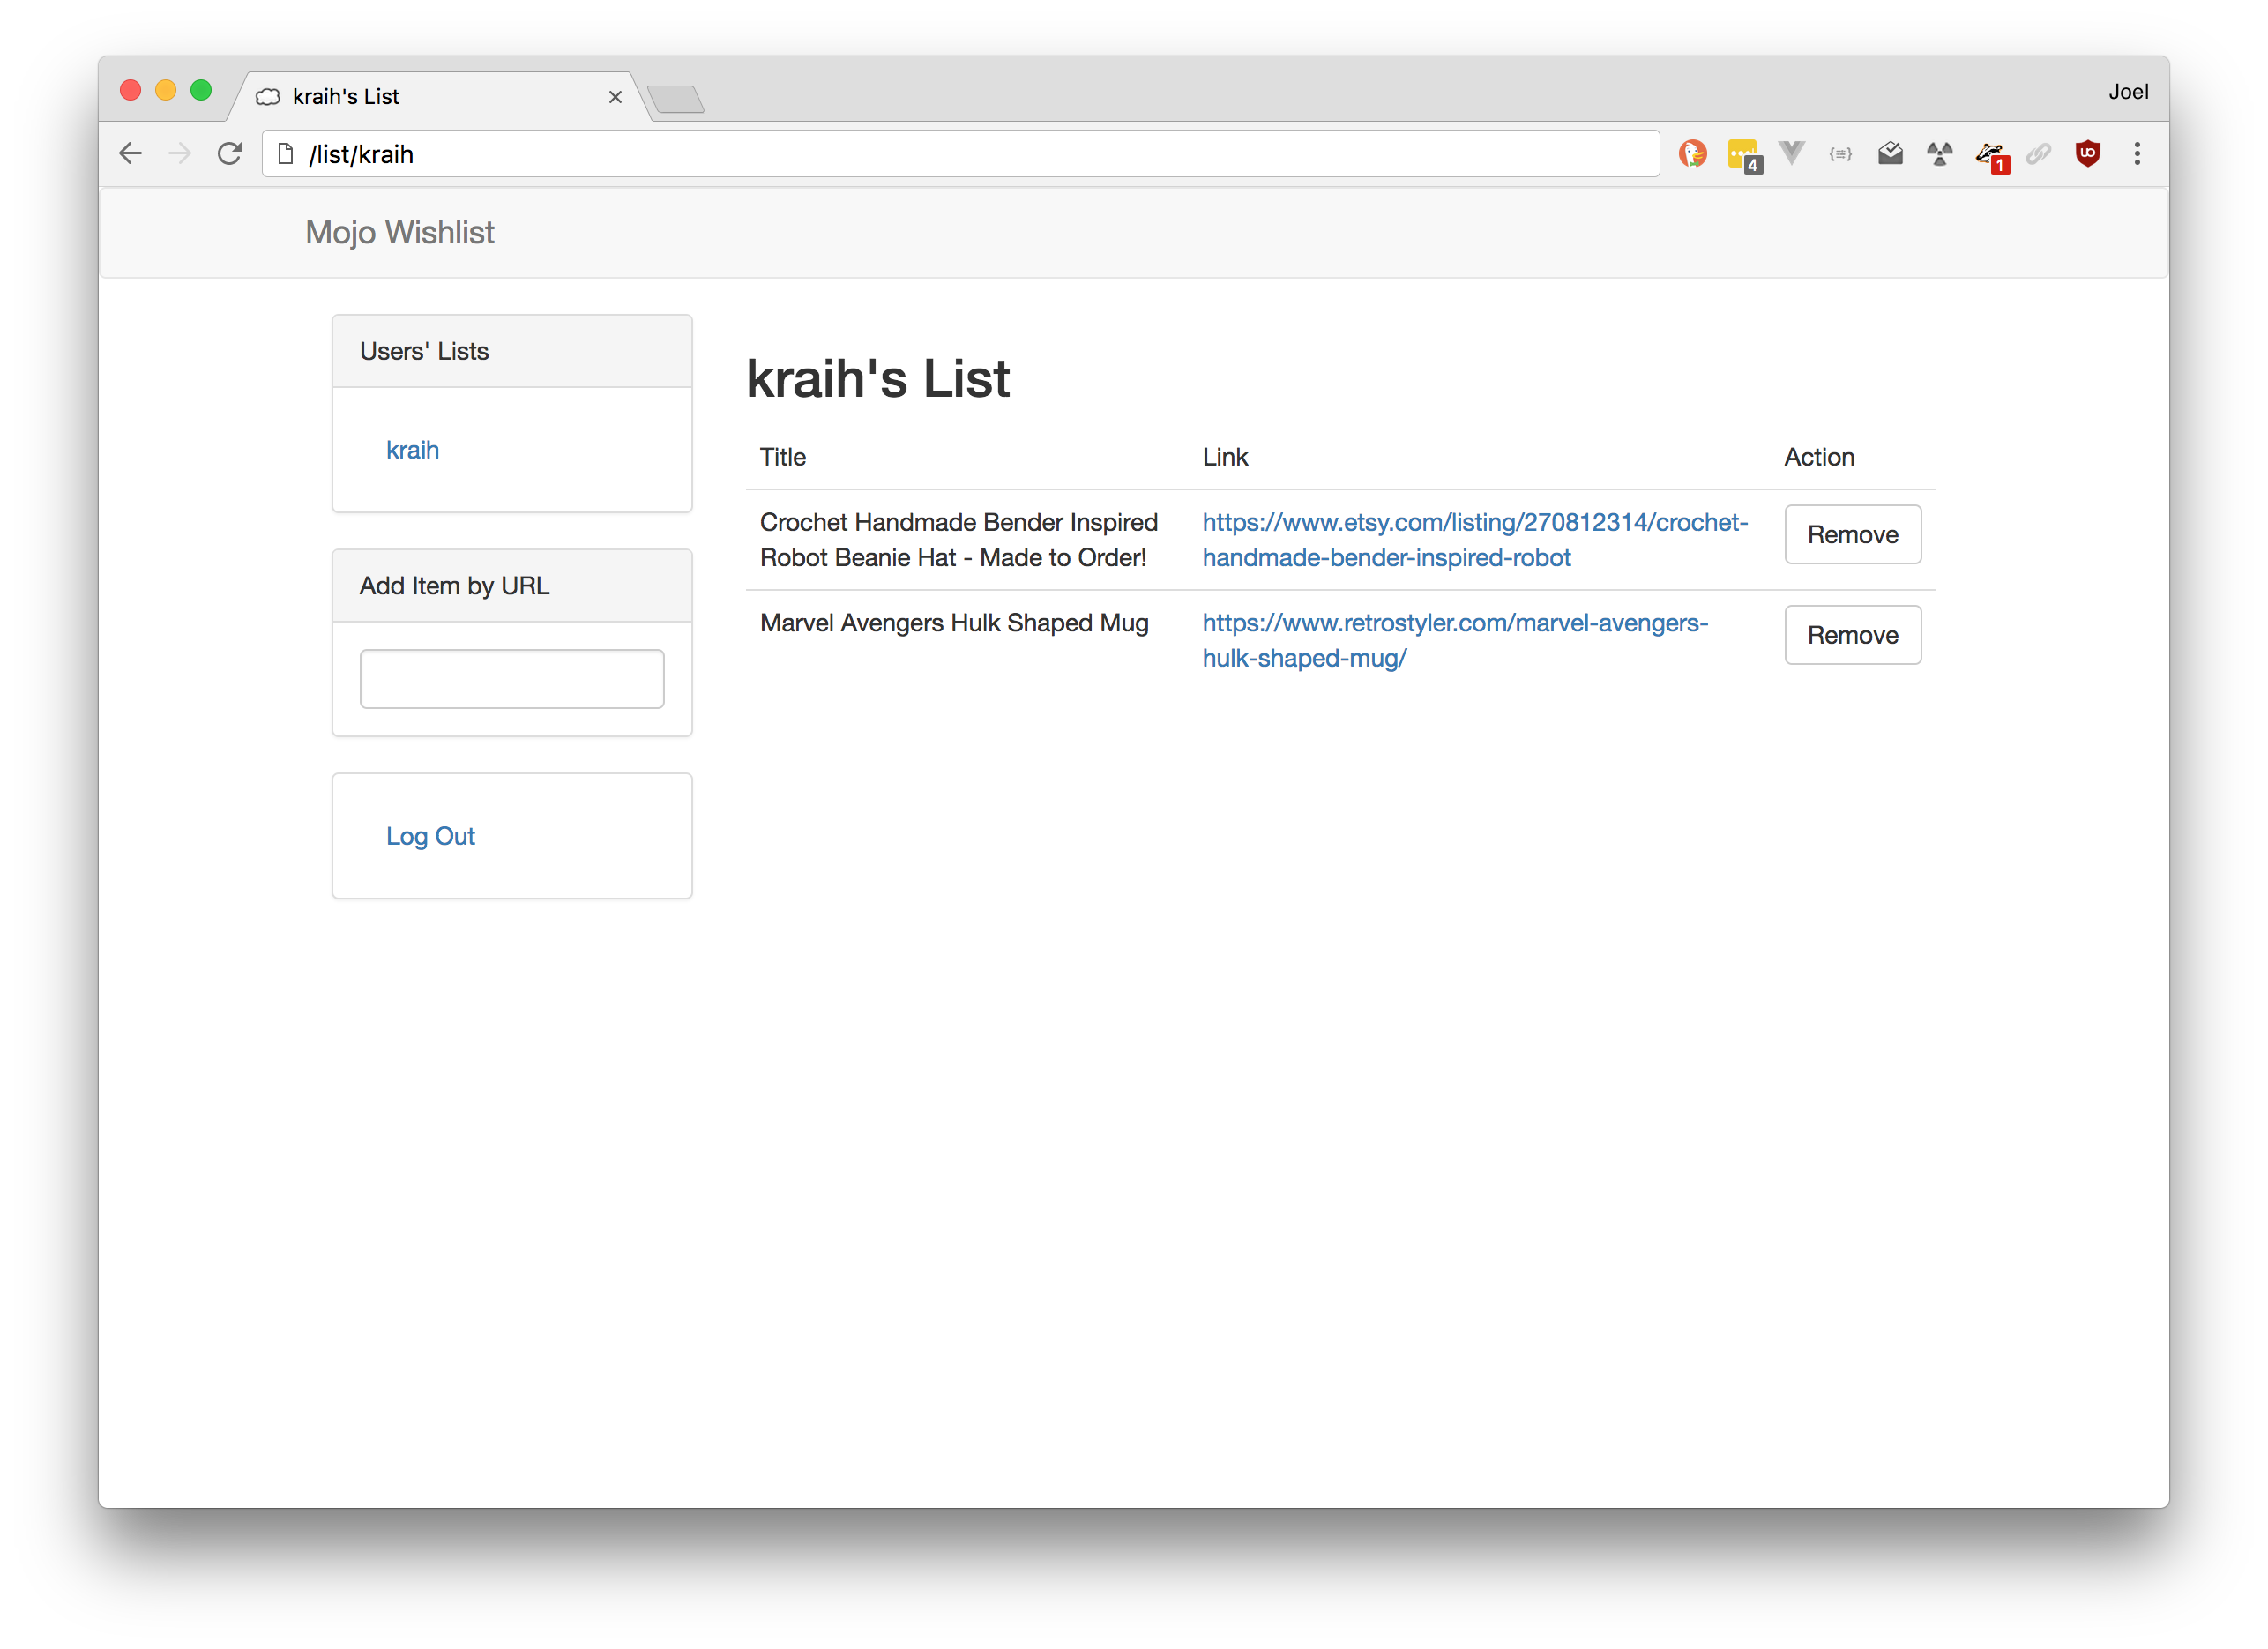
The List
There are two routes that might render a wishlist.
The / route either allows the user to log in or if they are, displays their list.
There is a also a /list/:name route that renders any user's list by name.
% title user->{name} . "'s List";
% layout 'default';

% content_for 'sidebar' => begin
  %= include 'partial/user_list'
  %= include 'partial/add_url'
  %= include 'partial/log_out'
% end

<h2><%= title %></h2>

<table class="table">
  <thead>
    <tr>
      <td>Title</td>
      <td>Link</td>
      <td>Action</td>
    </td>
  </thead>
  <tbody>
  % for my $key (sort keys %{ user->{items} }) {
    % my $item = user->{items}{$key};
    <tr>
      %= t td => $item->{title}
      %= t td => link_to $item->{url} => $item->{url}
      % if (session->{name} eq user->{name}) {
        %= t td => form_for 'remove' => begin
          %= hidden_field title => $key
          <input type="submit" value="Remove" class="btn btn-default">
        % end
      % } else {
        %= t td => form_for 'update' => begin
          %= hidden_field user  => user->{name}
          %= hidden_field title => $key
          % if ($item->{purchased}) {
            %= hidden_field purchased => 0
            <input type="submit" value="Mark Not Purchased" class="btn btn-default">
          % } else {
            %= hidden_field purchased => 1
            <input type="submit" value="Mark Purchased" class="btn btn-default">
          % }
        % end
      % }
    </tr>
  % }
  </tbody>
</table>
templates/list.html.ep
The template itself is the most complex in the application.
It includes three partial templates and places all of their content into the sidebar buffer.
It then looks up the user by virtue of that clever user helper and loops over their items.
The items are placed into a table, displaying the title and link to the item. The third column's contents depends if the list is being shown is the user's own page or not.
If not, they are likely considering buying one of these gifts for their friend or family member.
They are given the option to mark an item as purchased or not.
This is done by calling the /update method, the result of which will change the item's status and re-render the page.
If it is their own page, they don't want to have the surprise spoiled see that someone has bought their present.
So we don't show the purchase state.
However perhaps they have changed their mind and no longer want that item.
In that case, they are presented with a remove button which calls to the /remove route.
Finally let's look at those last two partials. There is a sidebar list of the users, so you can see everyone's list.
<div class="panel panel-default">
  <div class="panel-heading">
    Users' Lists
  </div>
  <div class="panel-body">
    <ul class="nav nav-pills nav-stacked">
      % for my $name (sort keys %{ users() }) {
        %= t li => link_to $name => list => {name => $name}
      % }
    </ul>
  </div>
</div>
templates/partial/user_list.html.ep
And an input box that allows the user to submit a link to add to their wishlist.
<div class="panel panel-default">
  <div class="panel-heading">
    Add Item by URL
  </div>
  <div class="panel-body">
    %= form_for 'add' => begin
      <input name="url" class="form-control">
    % end
  </div>
</div>
templates/partial/add_url.html.ep
This form calls back to the add template we saw earlier.
Moving On
As I said before, I'm looking forward to making a more complete application with proper storage for tomorrow. That said, the code shown today already works and is quite useful, even for as small as it is!
Image in the Public Domain.

Joel Berger
Joel has Ph.D. in Physics from the University of Illinois at Chicago. He an avid Perl user and author and is a member of the Mojolicious Core Team.